


Reducing Your App’s Size
Measure your app’s size, optimize its assets and settings, and adopt technologies that help streamline installation over a mobile internet connection.
On This Page
Overview
Topics
See Also
Overview
Even when your users are in areas with good mobile network coverage, their download speeds can vary, or their data plan may limit the amount of available high-speed data. To ensure that app downloads don’t take a long time or result in additional costs to users, the App Store limits the size of the apps they can install over a mobile connection. If an app’s size exceeds the limit, users need to connect to a Wi-Fi network to install it. Keep your app well below the size limit to maximize your app’s possible install base and minimize installation time.
In addition to these issues, devices may have only limited storage available, making it even more important to be mindful about your app’s size. Consider measuring it as part of your development and testing process, and plan to optimize it as you develop it.
Before you start optimizing your app, you first need to measure its download and installation sizes. However, none of the binaries that you create for debugging or that you upload to the App Store from within Xcode are suitable for measuring your app’s size. For example, you can’t use any of the following binaries:
The APP file (the app bundle)
The XCARCHIVE bundle that you create when your archive your app
The IPA file that you upload to App Store Connect
Those binaries contain resources and files that aren’t part of the bundles that your users download from the App Store; for example, DSYM files for crash reporting.
During development, the only way to get accurate download and installation sizes for your app is to create an app size report on your Mac. However, if your app is available through the App Store or the TestFlight app, App Store Connect provides the most accurate size information. It displays the size for each variant of your app and warns you if it exceeds the limit for downloading over a mobile internet connection.
Apps distributed for testing with TestFlight contain additional data that an App Store build doesn’t have, so the TestFlight build is larger. This additional data isn’t included in your app when you make it available in the App Store. However, when compared to the binary you uploaded, the final size of your app after it’s approved for the App Store may end up being slightly larger. This size increase can happen when the App Store performs additional processing on your app’s binaries, adding DRM to prevent app piracy and then recompressing the binaries.
The following figure shows a common workflow for measuring your app’s size and performing optimizations.
Flow chart that provides an overview of the process of measuring an app’s size and when to perform optimizations.
To learn more about viewing the file sizes of a build in App Store Connect, see the App Store Connect Help.
The following two sections describe how you can generate a size report with Xcode, and how you can automate its creation.
Create the App Size Report
While App Store Connect provides the most accurate measurements of your app’s size, Xcode’s built-in reporting tools can create an app size report for you. It provides close estimates of your app’s download and installation sizes. To create an app size report:
Archive your app in Xcode.
Export your archived app as an Ad Hoc, Development, or Enterprise build.
In the sheet for setting the development distribution options, choose “All compatible device variants” for app thinning, and enable Rebuild from Bitcode.
Sign your app and export it to your Mac.
This process creates a folder with your app’s artifacts:
A universal IPA file for older devices. This single IPA file contains assets and binaries for all variants of your app.
Thinned IPA files for each variant of your app. These files contain assets and binaries for only one variant.
The output folder for your exported app also contains the app size report: a file named App Thinning Size Report.txt. This report lists the compressed and uncompressed sizes for each of your app’s IPA files. The uncompressed size is equivalent to the size of the installed app on the device, and the compressed size is the download size of your app. The following shows the beginning of the app size report for a sample app:
App Thinning Size Report for All Variants of ExampleApp
Variant: ExampleApp.ipa
Supported variant descriptors: [device: iPhone11,4, os-version: 12.0], [device: iPhone9,4, os-version: 12.0], [device: iPhone10,3, os-version: 12.0], [device: iPhone11,6, os-version: 12.0], [device: iPhone10,6, os-version: 12.0], [device: iPhone9,2, os-version: 12.0], [device: iPhone10,5, os-version: 12.0], [device: iPhone11,2, os-version: 12.0], and [device: iPhone10,2, os-version: 12.0]
App + On Demand Resources size: 6.7 MB compressed, 18.6 MB uncompressed
App size: 6.7 MB compressed, 18.6 MB uncompressed
On Demand Resources size: Zero KB compressed, Zero KB uncompressed
// Other Variants of Your App.
With the app size report you generate, you’re now ready to perform some basic optimizations, such as checking your binaries for unused assets, to reduce the size of your app. For more information, see Doing Basic Optimization to Reduce Your App’s Size.
Automate the Generation of the App Size Report
Instead of creating the app size report with Xcode, you may want to automate its generation in build scripts or continuous integration workflows. Run the following command to use xcodebuild to export your app for distribution and create an app thinning size report:
xcodebuild -exportArchive -archivePath iOSApp.xcarchive -exportPath Release/MyApp -exportOptionsPlist OptionsPlist.plist
Replace all file names and paths as neccessary. To create the app size report, provide xcodebuild with an export options property list. Be sure to include the thinning key, with <thin-for-all-variants> as the value.
Important
Be sure to escape the angle brackets for the value in your export options property list.
To learn more about using xcodebuild, see Building from the Command Line with Xcode FAQ.
Building from the Command Line with Xcode FAQ
This document provides answers to frequently asked questions about command line tools.
What is the Command Line Tools Package?
The Command Line Tools Package is a small self-contained package available for download separately from Xcode and that allows you to do command line development in macOS. It consists of the macOS SDK and command-line tools such as Clang, which are installed in the /Library/Developer/CommandLineTools directory.
Downloading command-line tools is not available in Xcode for macOS 10.9. How can I install them on my machine?
In macOS 10.9 and later, the Downloads pane of Xcode Preferences does not support downloading command-line tools. Use any of the following methods to install command-line tools on your system:
Install Xcode
If Xcode is installed on your machine, then there is no need to install them. Xcode comes bundled with all your command-line tools. macOS 10.9 and later includes shims or wrapper executables. These shims, installed in
/usr/bin, can map any tool included in/usr/binto the corresponding one inside Xcode. xcrun is one of such shims, which allows you to find or run any tool inside Xcode from the command line. Use it to invoke any tool within Xcode from the command line as shown in Listing 1.Listing 1 Using xcrun to run dwarfdump in the Terminal application.
$ xcrun dwarfdump --uuid MySample.app/MySample
UUID: AD019F0E-1318-3F9F-92B6-9F95FBEBBE6F (armv7) MySample.app/MySample
UUID: BB59C973-06AC-388F-8EC1-FA3701C9E264 (arm64) MySample.app/MySample
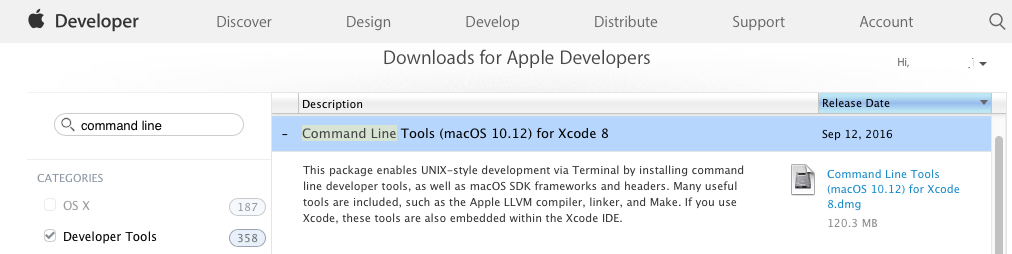
Download the Command Line Tools package from the Developer website
The Command Line Tools package is available for download on the Download for Apple Developers page. Log in with your Apple ID, then search and download the Command Line Tools package appropriate for your machine such as macOS 10.12 as shown in Figure 1.
Install the Command Line Tools package via the Terminal application
You can install the Command Line Tools package by running the
xcode-select --installcommand.
How can I uninstall the command-line tools?
Xcode includes all of the command-line tools. If it is installed on your system, remove it to uninstall the command-line tools.
If the
/Library/Developer/CommandLineToolsdirectory exists on your system, remove it to uninstall the command-line tools.
I have multiple versions of Xcode installed on my machine. What version of Xcode do the command-line tools currently use?
To find out what version of Xcode is being used by your tools, run the following command in Terminal:
$ xcode-select --print-path |
Listing 2 Printing the version of Xcode currently used by the command-line tools.
$ xcode-select --print-path |
/Applications/Xcode8.3.3/Xcode.app/Contents/Developer |
How do I select the default version of Xcode to use for my command-line tools?
To select a default Xcode for your command-line tools, run the following command in Terminal:
$ sudo xcode-select -switch <path/to/>Xcode.app |
where <path/to/> is the path to the Xcode.app package you wish to use for development.
Listing 3 Setting the default Xcode version.
$ sudo xcode-select -switch /Applications/Xcode8.3.3/Xcode.app |
How do I build my projects from the command line?
xcodebuild is a command-line tool that allows you to perform build, query, analyze, test, and archive operations on your Xcode projects and workspaces from the command line. It operates on one or more targets contained in your project, or a scheme contained in your project or workspace. xcodebuild provides several options for performing these operations as seen its man page. xcodebuild saves the output of your commands in the locations defined in the Locations preferences pane of your Xcode application, by default.
See below for various xcodebuild usage. Be sure to navigate to the directory containing your project or workspace in Terminal before running any of the following commands.
To list all schemes in your workspace, run the following command in Terminal:
xcodebuild -list -workspace <your_workspace_name>.xcworkspace
where <your_workspace_name> is the name of your workspace.
Listing 4 Listing all schemes in the MyApplication workspace.
$ cd /Users/username/Desktop/MyApplication
$ xcodebuild -list -workspace MyApplication.xcworkspace
Information about workspace "MyApplication":
Schemes:
iOSApp
tvOSApp
macOSApp
iOSWithWatchApp
iOSWithWatchApp WatchKit App
To list all targets, build configurations, and schemes used in your project, run the following command in Terminal:
xcodebuild -list -project <your_project_name>.xcodeproj
where <your_project_name> is the name of your project.
Listing 5 Listing all information about MyProject, an Xcode project.
$ cd /Users/username/Desktop/MyProject
$ xcodebuild -list -project MyProject.xcodeproj
Information about project "MyProject":
Targets:
iOS
iOSTests
iOSUITests
watchOS App
watchOS App Extension
tvOS
tvOSTests
tvOSUITests
macOS
macOSTests
macOSUITests
Build Configurations:
Debug
Release
If no build configuration is specified and -scheme is not passed then "Debug" is used.
Schemes:
iOS
watchOS App
tvOS
macOS
To build a scheme in your project, run the following command in Terminal:
xcodebuild -scheme <your_scheme_name> build
where <your_scheme_name> and build are respectively the name of your scheme to be built and the action to be performed on your scheme.
Listing 6 Building the tvOS scheme.
$ xcodebuild -scheme tvOS build
=== BUILD TARGET tvOS OF PROJECT MyProject WITH CONFIGURATION Debug ===
...
To build your target with a configuration file, run the following command in Terminal:
xcodebuild -target <your_target_name> -xcconfig <your_configuration_file>.xcconfig
where <your_target_name> and <your_configuration_file> are respectively the name of your target to be built and the name of your configuration file. See Xcode Help's Build configuration file reference for more information about xcconfig files.
Listing 7 Building the iOS target with a configuration file.
$ xcodebuild -target iOS -xcconfig configuration.xcconfig
Build settings from configuration file 'configuration.xcconfig':
IPHONEOS_DEPLOYMENT_TARGET = 10
SWIFT_TREAT_WARNINGS_AS_ERRORS = YES
=== BUILD TARGET watchOS Extension OF PROJECT MyProject WITH THE DEFAULT CONFIGURATION (Debug) ===
...
=== BUILD TARGET watchOS App OF PROJECT MyProject WITH THE DEFAULT CONFIGURATION (Debug) ===
...
=== BUILD TARGET iOS OF PROJECT MyProject WITH THE DEFAULT CONFIGURATION (Debug) ===
...
To change the output locations of your xcodebuild command, use the SYMROOT (Build Products Path) and DSTROOT (Installation Build Products Location) build settings that respectively specify a location for your debug products and .dSYM files and one for your released products. See Xcode Help's Build setting reference for more information about these build settings.
Listing 8 Setting up a location for iOS' debug app version.
$ xcodebuild -scheme iOS SYMROOT="/Users/username/Desktop/DebugLocation"
Build settings from command line:
SYMROOT = "/Users/username/Desktop/DebugLocation"
=== BUILD TARGET watchOS Extension OF PROJECT MyProject WITH CONFIGURATION Debug ===
...
=== BUILD TARGET watchOS App OF PROJECT MyProject WITH CONFIGURATION Debug ===
...
=== BUILD TARGET iOS OF PROJECT MyProject WITH CONFIGURATION Debug ===
...
Listing 9 Setting up a location for iOS's released app version.
$ xcodebuild -scheme iOS DSTROOT="/Users/username/Desktop/ReleaseLocation" archive
Build settings from command line:
DSTROOT = /Users/username/Desktop/ReleaseLocation
=== BUILD TARGET watchOS Extension OF PROJECT MyProject WITH CONFIGURATION Release ===
...
=== BUILD TARGET watchOS App OF PROJECT MyProject WITH CONFIGURATION Release ===
...
=== BUILD TARGET iOS OF PROJECT MyProject WITH CONFIGURATION Release ===
...
My app has multiple build configurations. How do I set a default build configuration for xcodebuild?
In Xcode, the Configurations section of your project's Info pane provides a pop-up menu, which sets the default configuration to be used by xcodebuild when building a target. Use this pop-up menu to select a default build configuration for xcodebuild as seen in Figure 2.

How do I run unit tests from the command line?
xcodebuild provides several options for running unit tests.
To build and run unit tests from the command line, execute the following command in Terminal:
xcodebuild test [-workspace <your_workspace_name>] |
[-project <your_project_name>] |
-scheme <your_scheme_name> |
-destination <destination-specifier> |
[-only-testing:<test-identifier>] |
[-skip-testing:<test-identifier>] |
To build unit tests without running them from the command line, execute the following command in Terminal:
xcodebuild build-for-testing [-workspace <your_workspace_name>] |
[-project <your_project_name>] |
-scheme <your_scheme_name> |
-destination <destination-specifier> |
To run unit tests without building them from the command line, execute any of the following command in Terminal:
xcodebuild test-without-building [-workspace <your_workspace_name>] |
[-project <your_project_name>] |
-scheme <your_scheme_name> |
-destination <destination-specifier> |
[-only-testing:<test-identifier>] |
[-skip-testing:<test-identifier>] |
xcodebuild test-without-building -xctestrun <your_xctestrun_name>.xctestrun |
-destination <destination-specifier> |
[-only-testing:<test-identifier>] |
[-skip-testing:<test-identifier>] |
The test action requires specifying a scheme and a destination. See How do I implement the Build For Testing and Test Without Building features from the command line? for more information about build-for-testing and test-without-building actions.
The -workspace option allows you to specify the name of your workspace. Use this option when your scheme is contained in an Xcode workspace.
The -project option allows you to specify the name of your Xcode project. Use this option when your scheme is contained in an Xcode project. It is required when there are multiple Xcode projects in the same directory and optional, otherwise.
The -destination option allows you to specify a destination for your unit tests. It takes an argument <destination-specifier>, which describes the device, simulator, or Mac to use as a destination. It consists of a set of comma-separated key=value pairs, which are dependent upon the the device, simulator, or Mac being used.
The -only-testing and -skip-testing options, which are optional, allow you to run only a specific test and to skip a test, respectively. They take an argument <test-identifier>, which specifies the test to be executed or excluded. test-identifier's format is as follows:
TestTarget[/TestClass[/TestMethod]] |
TestTarget, which is required, is the name of the test bundle. TestClass and TestMethod, which are both optional, respectively represent the name of the class and the name of the method to be tested.
For macOS apps,
destinationspecifiersupports the platform and arch keys as seen in Table 1. Both keys are required for running your unit tests in macOS.Table 1 Supported keys for macOS apps. Key
Description
Value
platform
The supported destination for your unit tests.
macOS
arch
The architecture to use to run your unit tests.
i386 or x86_64
See Listing 10 for an example that tests a scheme in macOS and where
destinationspecifieris set to 'platform=macOS,arch=x86_64'.Listing 10 Tests the macOS scheme for 64-bit in macOS.
xcodebuild test -scheme macOS -destination 'platform=macOS,arch=x86_64'
For iOS and tvOS apps,
destinationspecifiersupports the platform, name, and id keys as seen in Table 2.Table 2 Supported keys for iOS and tvOS apps. Key
Description
Value
platform
The supported destination for your unit tests.
iOS (for iOS apps) tvOS (for tvOS apps)
name
The full name of your device to be used for your unit tests.
The name of your device as displayed in the Devices Organizer in Xcode.
id
The identifier of your device to be used for your unit tests.
See Locate a device identifier for more information about getting your device identifier.
The name and id keys are intergeably used with platform, which is a required key as seen in Listing 11 and Listing 12.
Listing 11 Tests the iOS scheme on a device identified by 965058a1c30d845d0dcec81cd6b908650a0d701c.
xcodebuild test -workspace MyApplication.xcworkspace -scheme iOSApp -destination 'platform=iOS,id=965058a1c30d845d0dcec81cd6b908650a0d701c'
Listing 12 Testing the iOSApp scheme on an iPhone.
$ xcodebuild test -workspace MyApplication.xcworkspace -scheme iOSApp -destination 'platform=iOS,name=iPhone'
...
=== BUILD TARGET iOSApp OF PROJECT iOSApp WITH CONFIGURATION Debug ===
...
=== BUILD TARGET iOSAppTests OF PROJECT iOSApp WITH CONFIGURATION Debug ===
...
=== BUILD TARGET iOSAppUITests OF PROJECT iOSApp WITH CONFIGURATION Debug ===
...
Test Suite 'All tests' started at ...
Test Suite 'iOSAppTests.xctest' started at ...
Test Suite 'SecondTestClass' started at ...
Test Case '-[iOSAppTests.SecondTestClass testExampleA]' started.
Test Case '-[iOSAppTests.SecondTestClass testExampleB]' started.
Test Suite 'SecondTestClass' passed at ...
...
Test Suite 'iOSAppTests' started at ...
Test Case '-[iOSAppTests.iOSAppTests testExample]' started.
Test Case '-[iOSAppTests.iOSAppTests testPerformanceExample]' started.
Test Suite 'iOSAppTests' passed at ...
...
Test Suite 'iOSAppUITests.xctest' started at ...
Test Suite 'iOSAppUITests' started at ...
Test Case '-[iOSAppUITests.iOSAppUITests testLabels]' started.
Test Case '-[iOSAppUITests.iOSAppUITests testToolbar]' started.
...
** TEST SUCCEEDED **
Listing 13 Do not test iOSAppUITests on an iPhone.
xcodebuild test -workspace MyApplication.xcworkspace -scheme iOSApp -destination 'platform=iOS,name=iPhone' -skip-testing:iOSAppUITests
Listing 14 Only testing SecondTestClass' testExampleB in the iOSAppTests unit test.
$ xcodebuild test -workspace MyApplication.xcworkspace -scheme iOSApp -destination 'platform=iOS,name=iPhone' -only-testing:iOSAppTests/SecondTestClass/testExampleB
...
=== BUILD TARGET iOSApp OF PROJECT iOSApp WITH CONFIGURATION Debug ===
...
=== BUILD TARGET iOSAppTests OF PROJECT iOSApp WITH CONFIGURATION Debug ===
...
=== BUILD TARGET iOSAppUITests OF PROJECT iOSApp WITH CONFIGURATION Debug ===
...
Test Suite 'Selected tests' started at ...
Test Suite 'iOSAppTests.xctest' started at ...
Test Suite 'SecondTestClass' started at ...
Test Case '-[iOSAppTests.SecondTestClass testExampleB]' started.
Test Case '-[iOSAppTests.SecondTestClass testExampleB]' passed (0.007 seconds).
Test Suite 'SecondTestClass' passed at ...
...
** TEST SUCCEEDED **
For iOS Simulator and tvOS Simulator apps,
destinationspecifiersupports the platform, name, id, and OS keys as seen in Table 3.Table 3 Supported keys for iOS Simulator and tvOS Simulator apps. Key
Description
Value
platform
The supported destination for your unit tests.
iOS Simulator (iOS apps) tvOS Simulator (tvOS apps)
name
The full name of the simulator (iOS simulator for iOS apps and tvOS Simulator for tvOS apps) to be used for your unit tests and as displayed in the run destination of your Xcode project.
The name of your device as displayed in the Devices Organizer in Xcode.
id
The identifier of your device to be used for your unit tests.
See Locate a device identifier for more information about getting your device identifier.
OS
The version of iOS or tvOS to simulate such as 9.0 or the string latest to indicate the most recent version of iOS supported by your version of Xcode.
An iOS version, tvOS version, or latest
The name and id keys are intergeably used with platform, which is a required key as shown in Listing 15 and Listing 16. The OS key is optional.
Listing 15 Tests the iOS scheme on an iPad Pro (12.9 inch) with iOS 10.2 in the Simulator.
xcodebuild test -scheme iOS -destination 'platform=iOS Simulator,name=iPad Pro (12.9-inch),OS=10.2'
Listing 16 Tests the tvOS scheme on an tvOS Simulator identified by D6FA2C2A-E297-406A-AA22-624B4834ACB2.
xcodebuild test -scheme tvOS -destination 'platform=tvOS Simulator,id=D6FA2C2A-E297-406A-AA22-624B4834ACB2'
The -destination option also allows you to run the same unit test on multiple destinations. This is done by adding it multiple times to your xcodebuild test command as demonstrated in Listing 17.
Listing 17 Tests the iOS scheme in both the Simulator and on an iPod touch.
xcodebuild test -scheme iOS -destination 'platform=iOS Simulator,name=iPhone 6s,OS=10.3' -destination 'platform=iOS,name=iPod touch' |
How do I implement the Build For Testing and Test Without Building features from the command line?
xcodebuild provides the
build-for-testingaction for Xcode's Product > Build For > Testing feature. You must specify a scheme to use it. To use it, execute the following command in Terminal:xcodebuild build-for-testing [-workspace <your_workspace_name>]
[-project <your_project_name>]
-scheme <your_scheme_name>
-destination <destination-specifier>
See How do I run unit tests from the command line? for more information about xcodebuild
build-for-testing's options.Listing 18 Builds tests and associated targets in the tvOS scheme using the tvOS Simulator identified by D6FA2C2A-E297-406A-AA22-624B4834ACB2.
xcodebuild build-for-testing -scheme tvOS -destination 'platform=tvOS Simulator,id=D6FA2C2A-E297-406A-AA22-624B4834ACB2'
build-for-testinggenerates an xctestrun file, which is saved in the derived data folder. See xcodebuild.xctestrun's man page for more information about xctestrun files.xcodebuild provides the
test-without-buildingaction for Xcode's Product > Perform Action > Test Without Building feature.test-without-buildingrequires that you specify either a scheme or an xctestrun file.Usage when using a scheme
xcodebuild test-without-building [-workspace <your_workspace_name>]
[-project <your_project_name>]
-scheme <your_scheme_name>
-destination <destination-specifier>
[-only-testing:<test-identifier>]
[-skip-testing:<test-identifier>]
See How do I run unit tests from the command line? for more information about xcodebuild
test-without-building's options.Listing 19 Tests the iOSApp scheme on an iPhone SE with iOS 10.1 in the Simulator.
xcodebuild test-without-building -workspace MyApplication.xcworkspace -scheme iOSApp -destination 'platform=iOS Simulator,name=iPhone SE,OS=10.1'
Usage when using an xctestrun file
xcodebuild test-without-building -xctestrun <your_xctestrun_name>.xctestrun
-destination <destination-specifier>
[-only-testing:<test-identifier>]
[-skip-testing:<test-identifier>]
where <your_xctestrun_name> is the name of the file containing your test run parameters. See xcodebuild.xctestrun' s man page for more information about xctestrun files. See How do I run unit tests from the command line? for more information about the other options.
Listing 20 Testing bundles and other parameters specified in iOSApp_iphonesimulator.xctestrun using the iOS Simulator identified by 6DC4A7BA-EA7F-40D6-A327-A0A9DF82F7F6.
$ cat iOSApp_iphonesimulator.xctestrun
<?xml version="1.0" encoding="UTF-8"?>
<!DOCTYPE plist PUBLIC "-//Apple//DTD PLIST 1.0//EN" "http://www.apple.com/DTDs/PropertyList-1.0.dtd">
<plist version="1.0">
<dict>
<key>iOSAppTests</key>
<dict>
<key>BundleIdentifiersForCrashReportEmphasis</key>
<array>
<string>com.myapps.iOSApp</string>
<string>com.myapps.iOSAppTests</string>
<string>com.myapps.iOSAppUITests</string>
</array>
…
<key>TestBundlePath</key>
<string>__TESTHOST__/PlugIns/iOSAppTests.xctest</string>
<key>TestHostBundleIdentifier</key>
<string>com.myapps.iOSApp</string>
<key>TestHostPath</key>
<string>__TESTROOT__/Debug-iphonesimulator/iOSApp.app</string>
…
</dict>
<key>iOSAppUITests</key>
…
</dict>
</plist>
$ xcodebuild test-without-building -xctestrun iOSApp_iphonesimulator.xctestrun -destination 'platform=iOS Simulator,id=6DC4A7BA-EA7F-40D6-A327-A0A9DF82F7F6'
Listing 21 Tests everything but iOSAppUITests specified in iOSApp_iphonesimulator.xctestrun using the iOS Simulator identified by 3D95DF14-E8B7-4A05-B65B-78F381B74B22.
xcodebuild test-without-building -xctestrun iOSApp_iphonesimulator.xctestrun -destination 'platform=iOS Simulator,id=3D95DF14-E8B7-4A05-B65B-78F381B74B22' -skip-testing:iOSAppUITests
What keys can I pass to the exportOptionsPlist flag?
To get all available keys for -exportOptionsPlist, run the following command in Terminal:
xcodebuild -help |
Listing 22 Fetching all keys supported by -exportOptionsPlist.
$ xcodebuild -help |
Usage: xcodebuild [-project <projectname>] [[-target <targetname>]...|-alltargets] [-configuration <configurationname>] [-arch <architecture>] |
... |
Available keys for -exportOptionsPlist: |
compileBitcode : Bool |
... |
embedOnDemandResourcesAssetPacksInBundle : Bool |
... |
iCloudContainerEnvironment |
... |
manifest : Dictionary |
... |
method : String |
... |
onDemandResourcesAssetPacksBaseURL : String |
... |
teamID : String |
... |
thinning : String |
... |
uploadBitcode : Bool |
... |
uploadSymbols : Bool |
... |
See Figure 3 for a sample file that contains some options for the -exportOptionsPlist flag.

How do I archive and export my app for distribution?
To archive and export your app for distribution, run the following command in Terminal:
xcodebuild -exportArchive -archivePath <xcarchivepath> -exportPath <destinationpath> -exportOptionsPlist <path> |
where <xcarchivepath> specifies the archive or the path of the archive to be exported, <destinationpath> specifies where to save the exported product, and <path> is the path to the file with a list of options for the -exportOptionsPlist flag.
Listing 23 Exports the iOSApp archive to the Release location with the options saved in the OptionsPlist.plist.
xcodebuild -exportArchive -archivePath iOSApp.xcarchive -exportPath Release/MyApp -exportOptionsPlist OptionsPlist.plist |
Document Revision History
| Date | Notes |
|---|---|
| 2017-06-19 | Updated the "How do I run unit tests from the command line?" question. Added the "How do I implement the Build For Testing and Test Without Building features from the command line?" and "What keys can I pass to the exportOptionsPlist flag?" questions. |
Updated the "How do I run unit tests from the command line?" question. Added the "How do I implement the Build For Testing and Test Without Building features from the command line?" and "What keys can I pass to the exportOptionsPlist flag?" questions. | |
| 2014-05-21 | New document that provides answers to frequently asked questions about command-line tools. |