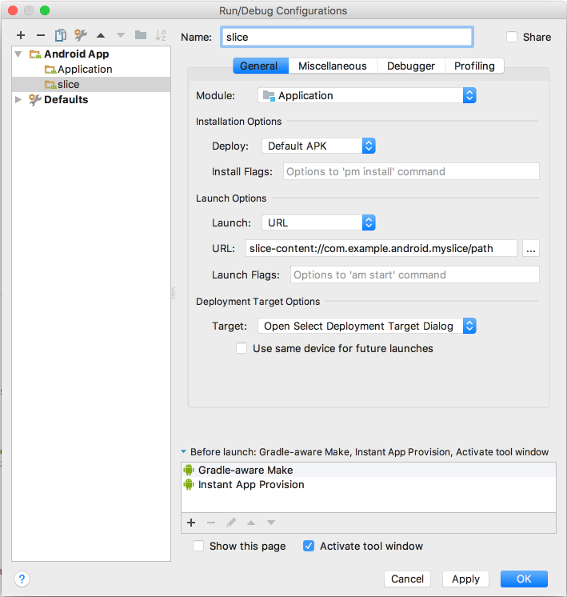
Game World!

Join A World Of Gamers

Enter your email address:

Delivered by FeedBurner

Followers

Popular Posts

Saturday 26 June 2021

What is slice viewer?

 This page shows you how to set up your environment and build Slices in your app.

Note: Android Studio 3.2 or later contains additional tools and functionality that can help you with Slice development:

  • AndroidX refactoring tool: required if you're working in a project that uses AndroidX libraries.
  • Slices lint checks: catches common anti-practices when building Slices
  • SliceProvider template: handles the boilerplate when building a SliceProvider

Download the latest sample Slice Viewer APK release that you can use to test your Slices without implementing the SliceView API. You can also clone the Slice Viewer source.

If ADB is not set up properly in your environment, see the ADB guide for more information.

Install the Slice Viewer on your device by running the following command in the same directory as the downloaded slice-viewer.apk:

adb install -r -t slice-viewer.apk

You can launch the Slice Viewer either from your Android Studio project or from the command line:

  1. In your project, select Run > Edit Configurations...
  2. In the top-left corner, click the green plus sign
  3. Select Android App

  4. Enter slice in the name field

  5. Select your app module in the Module dropdown

  6. Under Launch Options, select URL from the Launch dropdown

  7. Enter slice-<your slice URI> in the URL field

    Example: slice-content://com.example.your.sliceuri

  8. Click OK

Run your app from Android Studio:

adb install -t -r <yourapp>.apk

View your Slice by running the following command:

adb shell am start -a android.intent.action.VIEW -d slice-<your slice URI>

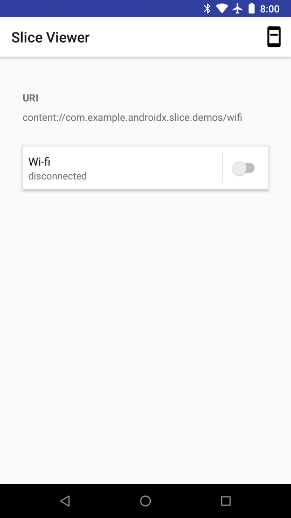
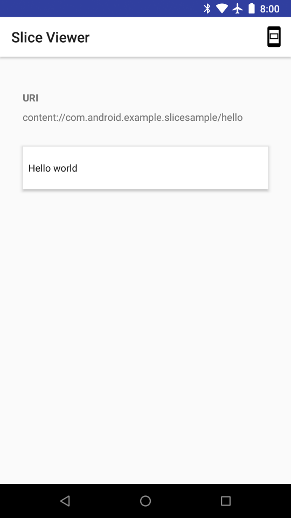
Slice Viewer showing a single WiFi Slice
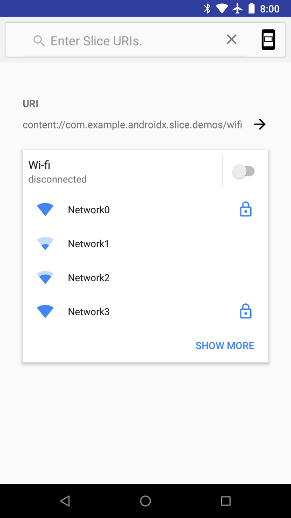
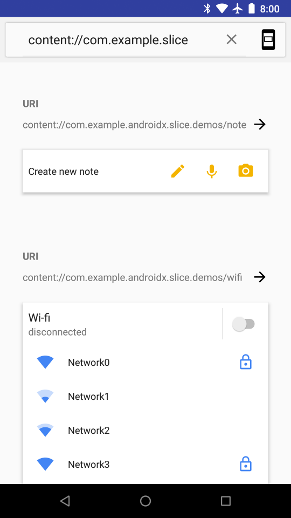
In addition to launching a single Slice, you can view a persistent list of your Slices.

  • Use the search bar to manually search for your Slices via URI (for example, content://com.example.android.app/hello). Each time you search, the Slice is added to the list.
  • Any time you launch the Slice Viewer tool with a Slice URI, the Slice is added to the list.
  • You can swipe a Slice to remove it from the list.
  • Tap the URI of the Slice to see a page containing only that Slice. This has the same effect as launching Slice Viewer with a Slice URI.

Slice Viewer showing a list of Slices

An app that presents a Slice can modify the SliceView#mode at runtime, so you should make sure your Slice looks as expected in each mode. Select the menu icon in the top-right area of the page to change the mode.

Single Slice viewer with mode set to "small"

To build a Slice, open your Android Studio project, right-click your src package, and select New... > Other > Slice Provider. This creates a class that extends SliceProvider, adds the required provider entry to your AndroidManifest.xml, and modifies your build.gradle to add the required Slice dependencies.

The modification to AndroidManifest.xml is shown below:

<manifest xmlns:android="http://schemas.android.com/apk/res/android"
   
package="com.example.android.app">
    ...
   
<application>
        ...
       
<provider android:name="MySliceProvider"
           
android:authorities="com.example.android.app"
           
android:exported="true" >
           
<intent-filter>
               
<action android:name="android.intent.action.VIEW" />
               
<category android:name="android.app.slice.category.SLICE" />
           
</intent-filter>
       
</provider>
        ...
   
</application>

</manifest>

The following dependencies are added to your build.gradle:

dependencies {
// ...
    implementation
"androidx.slice:slice-builders-ktx:(latest version)"
// ...
}

Each Slice has an associated URI. When a surface wants to display a Slice, it sends a binding request to your app with this URI. Your app then handles this request and dynamically builds the Slice via the onBindSlice method. The surface can then display the Slice when appropriate.

Below is an example of an onBindSlice method that checks for the /hello URI path and returns a Hello World Slice:

override fun onBindSlice(sliceUri: Uri): Slice? {
   
val activityAction = createActivityAction()
   
return if (sliceUri.path == "/hello") {
        list
(context, sliceUri, ListBuilder.INFINITY) {
            row
{
                primaryAction
= activityAction
                title
= "Hello World."
           
}
       
}
   
} else {
        list
(context, sliceUri, ListBuilder.INFINITY) {
            row
{
                primaryAction
= activityAction
                title
= "URI not recognized."
           
}
       
}
   
}
}

Use the slice run configuration that you created in the Slice Viewer section above, passing in your Slice URI (for example, slice-content://com.android.example.slicesample/hello) of the Hello World Slice to view it in the Slice Viewer.
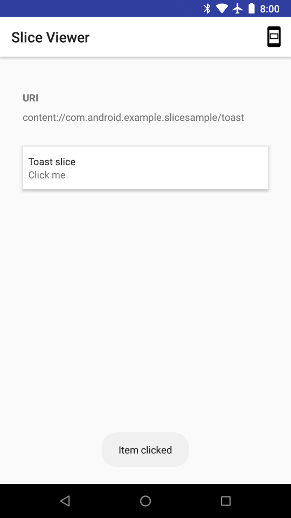
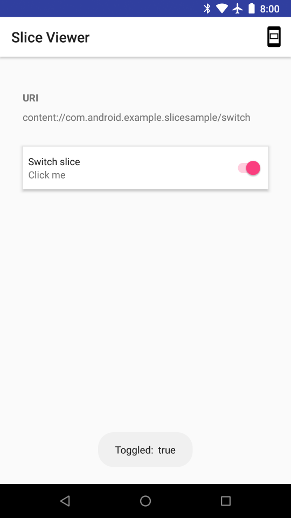
Similar to notifications, you can handle clicks within your Slice by attaching PendingIntent objects that are triggered on user interaction. The example below starts an Activity that can receive and handle those intents:

fun createSlice(sliceUri: Uri): Slice {
   
val activityAction = createActivityAction()
   
return list(context, sliceUri, INFINITY) {
        row
{
            title
= "Perform action in app"
            primaryAction
= activityAction
       
}
   
}
}

fun createActivityAction(): SliceAction {
   
val intent = Intent(context, MainActivity::class.java)
   
return SliceAction.create(
       
PendingIntent.getActivity(context, 0, Intent(context, MainActivity::class.java), 0),
       
IconCompat.createWithResource(context, R.drawable.ic_home),
       
ListBuilder.ICON_IMAGE,
       
"Enter app"
   
)
}

Slices also support other input types, such as toggles, that include state in the intent that is sent to the app.

fun createBrightnessSlice(sliceUri: Uri): Slice {
   
val toggleAction =
       
SliceAction.createToggle(
            createToggleIntent
(),
           
"Toggle adaptive brightness",
           
true
       
)
   
return list(context, sliceUri, ListBuilder.INFINITY) {
        row
{
            title
= "Adaptive brightness"
            subtitle
= "Optimizes brightness for available light"
            primaryAction
= toggleAction
       
}
        inputRange
{
            inputAction
= (brightnessPendingIntent)
            max
= 100
            value
= 45
       
}
   
}
}

fun createToggleIntent(): PendingIntent {
   
val intent = Intent(context, MyBroadcastReceiver::class.java)
   
return PendingIntent.getBroadcast(context, 0, intent, 0)
}

The receiver can then check the state that it receives:

class MyBroadcastReceiver : BroadcastReceiver() {

   
override fun onReceive(context: Context, intent: Intent) {
       
if (intent.hasExtra(Slice.EXTRA_TOGGLE_STATE)) {
           
Toast.makeText(context, "Toggled:  " + intent.getBooleanExtra(
                   
Slice.EXTRA_TOGGLE_STATE, false),
                   
Toast.LENGTH_LONG).show()
       
}
   
}

   
companion object {
        const
val EXTRA_MESSAGE = "message"
   
}
}

Slices can also contain dynamic content. In the following example, the Slice now includes the number of broadcasts received in its content:

fun createDynamicSlice(sliceUri: Uri): Slice {
   
return when (sliceUri.path) {
       
"/count" -> {
           
val toastAndIncrementAction = SliceAction.create(
                createToastAndIncrementIntent
("Item clicked."),
                actionIcon
,
               
ListBuilder.ICON_IMAGE,
               
"Increment."
           
)
            list
(context, sliceUri, ListBuilder.INFINITY) {
                row
{
                    primaryAction
= toastAndIncrementAction
                    title
= "Count: ${MyBroadcastReceiver.receivedCount}"
                    subtitle
= "Click me"
               
}
           
}
       
}

       
else -> {
            list
(context, sliceUri, ListBuilder.INFINITY) {
                row
{
                    primaryAction
= createActivityAction()
                    title
= "URI not found."
               
}
           
}
       
}
   
}
}

fun createToastAndIncrementIntent(s: String): PendingIntent {
   
return PendingIntent.getBroadcast(
        context
, 0,
       
Intent(context, MyBroadcastReceiver::class.java)
           
.putExtra(MyBroadcastReceiver.EXTRA_MESSAGE, s), 0
   
)
}

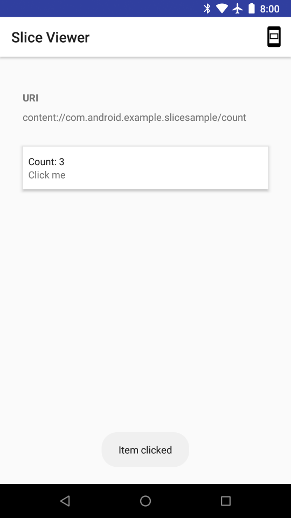
In this example, while the count is shown, it doesn’t update on its own. You can modify your broadcast receiver to notify the system that a change has occurred by using ContentResolver#notifyChange.

class MyBroadcastReceiver : BroadcastReceiver() {

   
override fun onReceive(context: Context, intent: Intent) {
       
if (intent.hasExtra(Slice.EXTRA_TOGGLE_STATE)) {
           
Toast.makeText(
                context
, "Toggled:  " + intent.getBooleanExtra(
                   
Slice.EXTRA_TOGGLE_STATE, false
               
),
               
Toast.LENGTH_LONG
           
).show()
            receivedCount
++;
            context
.contentResolver.notifyChange(sliceUri, null)
       
}
   
}

   
companion object {
       
var receivedCount = 0
       
val sliceUri = Uri.parse("content://com.android.example.slicesample/count")
        const
val EXTRA_MESSAGE = "message"
   
}
}

Floating Button

Button