


How to install Node.js and npm on macOS
In this post, we'll be looking at three different ways to install Node.js and its package manager, Node Package Manager, on macOS. We will discuss how to install Node.js using mac-native package installer, homebrew, a 3rd party installer, Node Version Manager and how to hop between different Node.js versions using Node Version Manager
A simple guide on how to set up Node.js development environment on macOS.
Node.js is an open-source runtime environment, which allows developers to create networked applications and web-servers in JavaScript. The main thing to remember is that Node.js is asynchronous and event-driven, which means it can support hundreds of simultaneous calls in the event loop. Basically, this means that a Node-based server does not wait for an API to return data. You can see a great example of asynchronous programming in Node.js here.
Node.js therefore shines in building fast, data-intensive, and real-time network applications, such as Uber and PayPal. However, you can also use Node.js to build your private blockchain.
When using Node.js, you’ll also need to use Node Package Manager, or npm for short. npm is a package management framework for Node.js. It provides a command line utility tool to install Node.js libraries and manage their versions and dependencies. If you’ve ever used other programming languages, such as Ruby or Python, then you’ll notice that npm is analogous to rubygems in Ruby or pip / poetry in Python.
In this post, we'll learn how to install Node.js and Node Package Manager (NPM) in a macOS environment.
What you will learn:#
By the end of this tutorial you will have a good grasp on the following:
How to install Node.js and NPM using the macOS installer available from the Node.js website
How to install Node.js and NPM using
homebrew, arguably the most popular package manager for macOSHow to install Node.js and NPM using Node Version Manager, or
nvmfor short. This is by far the best method to set up Node.js on your system because it gives you control and flexibility when hopping between different projects and their requirements.How to switch between different Node.js versions using
nvm
This post is intended for complete beginners to JavaScript or for folks switching from Ruby or Python to JavaScript for their backend production. It doesn’t assume any background knowledge of JavaScript (although it doesn’t hurt to have some!). However, this tutorial will cover everything you need to know and hopefully will get you up to speed in no time!
Ready? Let’s jump in.
To check whether you already have Node installed, open new terminal window and type:
node -vIf you have Node.js installed, it should output Node’s version. If you don’t, you’ll see one of the two messages, depending on whether you use bash or zsh shell:
- bash: command not found: node
- zsh: command not found: node
That means that the command you are trying to run is not installed. But worry not, there are several ways to install Node.js and NPM:
using the macOS installer available from the Node.js website
using
homebrewusing Node Version Manager (recommended)
I’ll go over each method step-by-step.
1) Using the macOS installer available from the Node.js website#
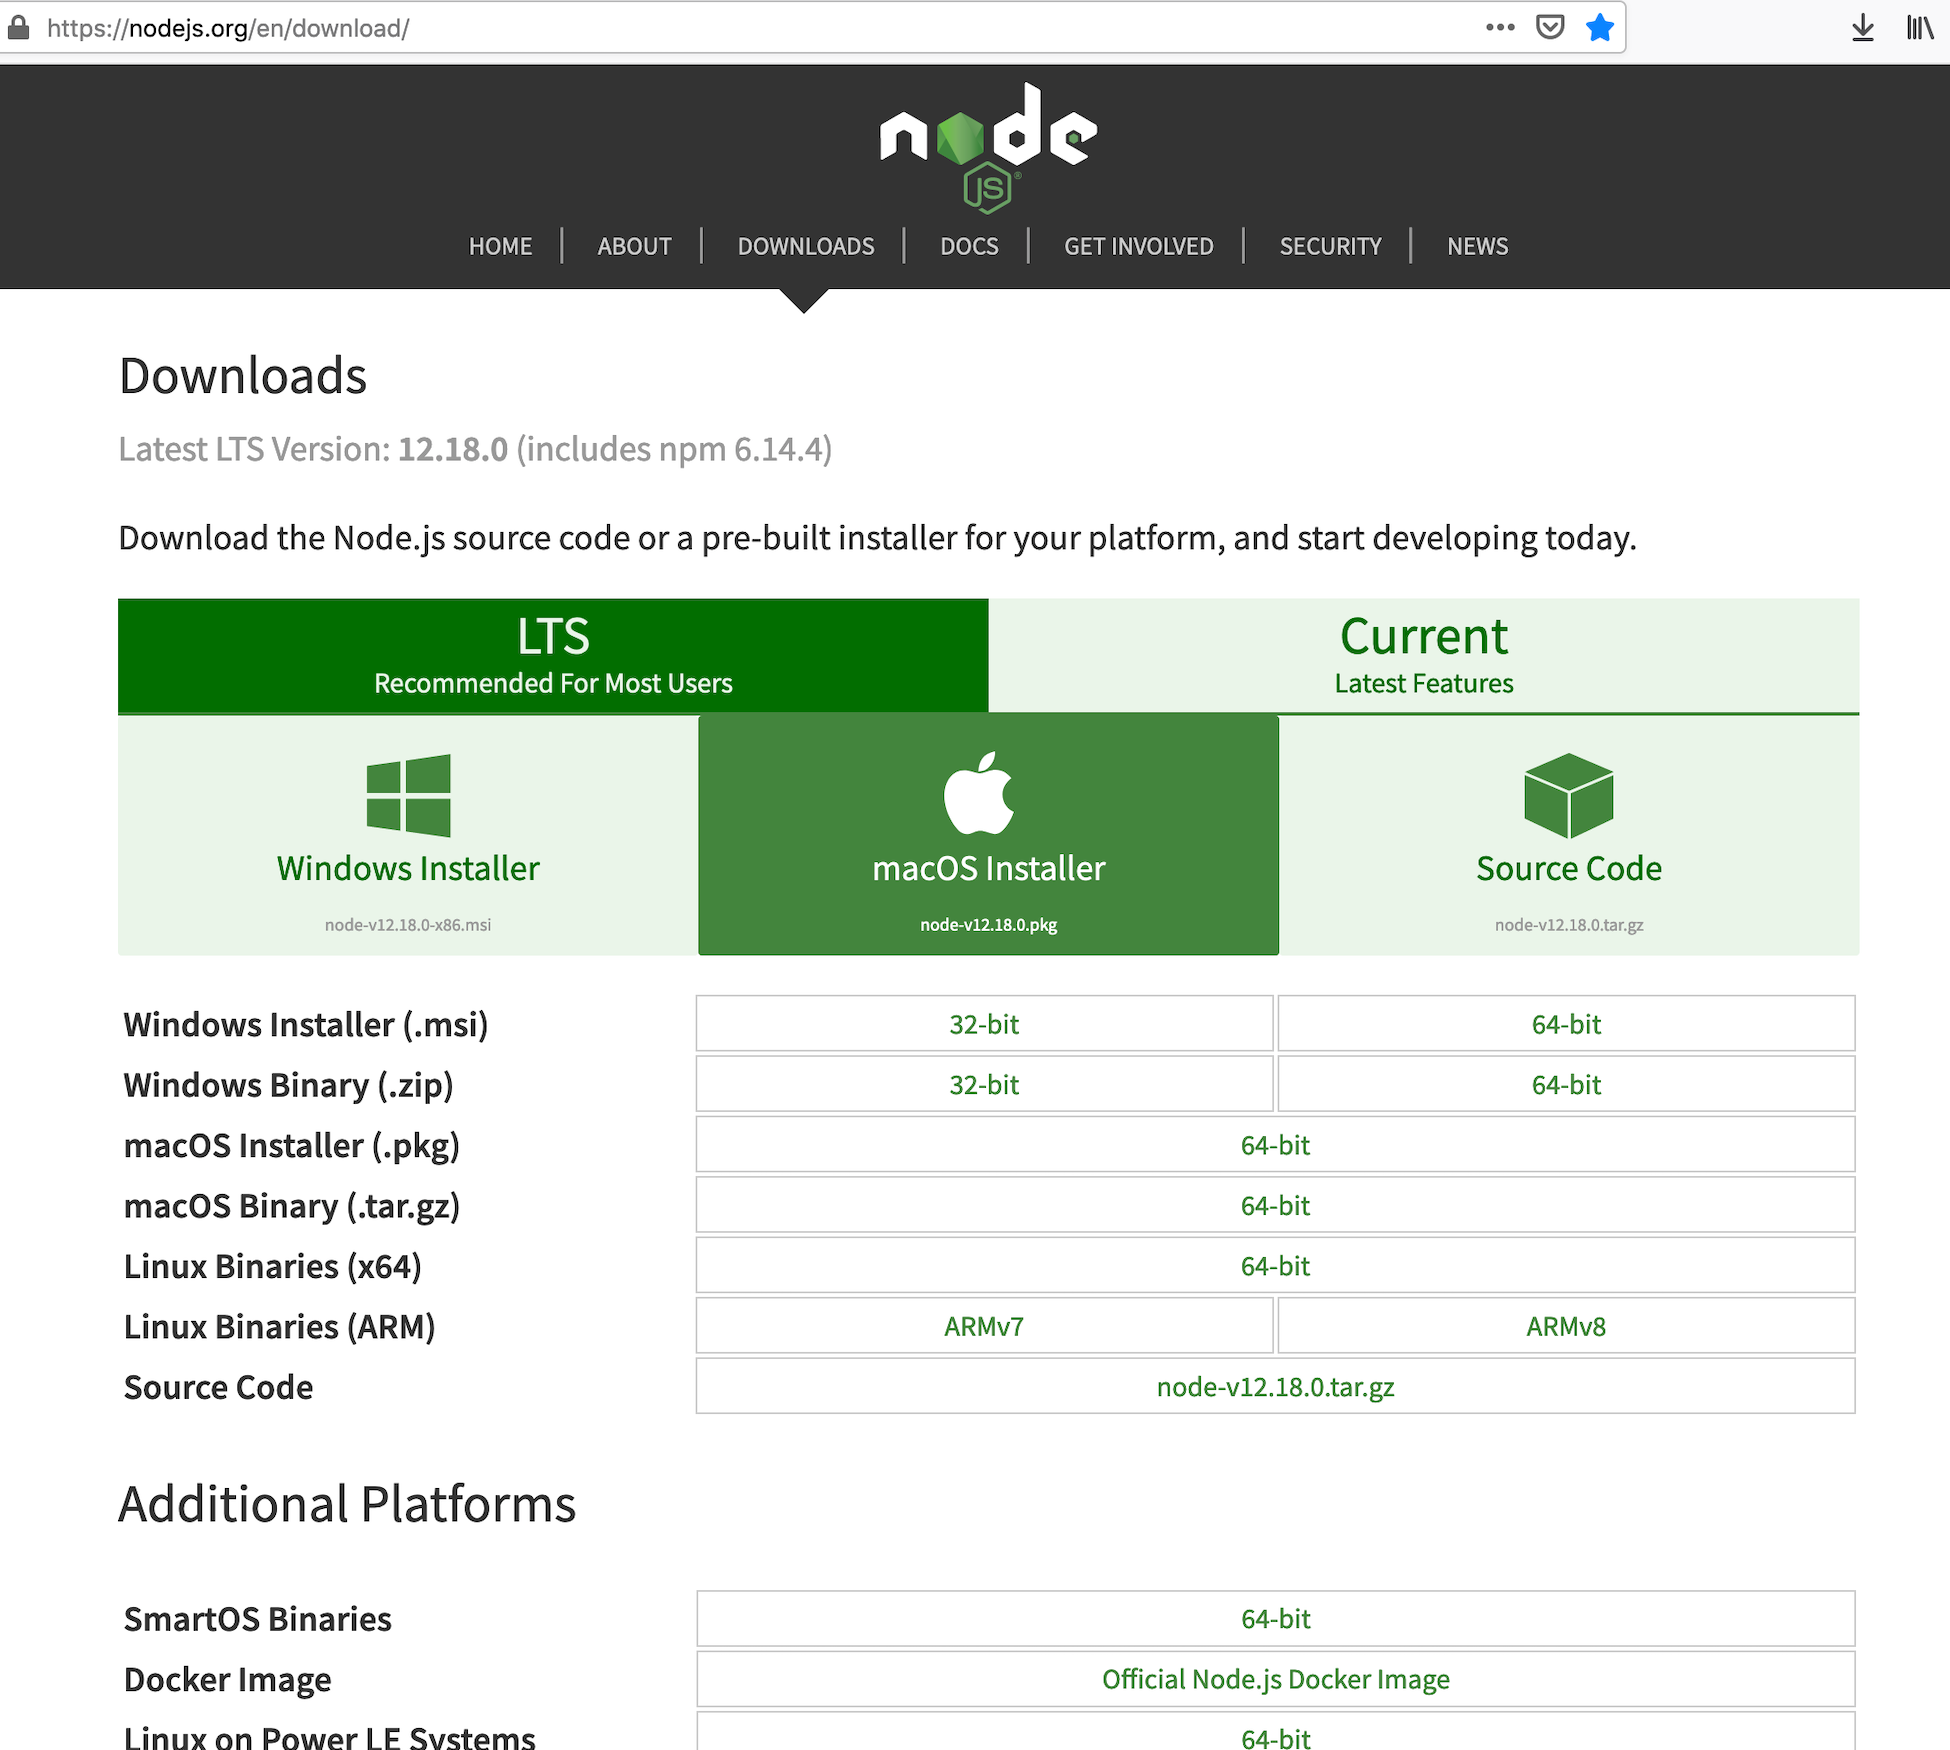
Visit the Node.js website where you can download a pre-built installer for your mac platform.
There are two types of Node.js releases: long-term support (LTS) and current. LTS releases are more polished and bug-free and will suffice for the majority of everyday users. Current releases are typically more experimental and contain the latest features, which may not be completely finished and could occasionally crash. You can switch between LTS and current versions by highlighting the field in the first tab. Again, the LTS version is recommended for most users. Therefore, if the LTS tab is highlighted in dark green, you can simply click on the macOS Installer option, which will download the .pkg installer for Node.js.
This installer will also automatically install NPM for you. Just follow these steps:
Download the Node.js
.pkgInstaller:Opening
node-v12.18.0.pkgSelect Open with Installer (default)
Run the
.pkgInstaller and follow the instructions that will guide you through the interface:Introduction
Select Continue
License
Select Continue
Select Agree
Installation Type
Select Install
Authenticate using your macOS password to install the software
Select Install Software
Summary; you should see that Node.js and
npmwere installedSelect Close
Double-check that Node.js and NPM were installed:
node -vYou should now see output v12.18.0 or some other version of the software that's just been installed.
npm -vYou should now see output 6.14.5 which represents the NPM version.
2) Using homebrew to install and update Node.js#
Homebrew is arguably the most popular package manager for macOS and makes installing Node.js straightforward. Let's check whether you have Homebrew installed:
brew -vIf Homebrew is installed on your mac, you should see its version, for example, Homebrew 2.3.0. If not, you can install Homebrew with the following command:
/usr/bin/ruby -e "$(curl -fsSL https://raw.githubusercontent.com/Homebrew/install/master/install)"Assuming that Homebrew is already installed, type:
brew updatebrew install nodeAnd that’s all you need. Again, try node -v to confirm Node.js version and npm -v to confirm NPM version.
While using Homebrew for Node.js installation is very easy, it comes with one disadvantage:
Unfortunately, Homebrew has a habit of installing only the latest version of Node.js.
This could be a problem because sometimes applications require a certain version of Node.js to work. Having the flexibility of using specific versions can be an asset. To fix this problem, the best option to install Node.js is via nvm, which stands for Node Version Manager.
3) Using nvm to install and update Node.js (recommended)#
Node Version Manager, nvm, is a bash script to manage multiple active Node.js versions. It is easy to run with the following steps:
Open new terminal window
Run
nvminstall scriptThe script clones the nvm repository to
~/.nvmand adds the source lines to your shell profile, which is one the following:~/.bash_profile,~/.zshrc,~/.profile,or~/.bashrc. You can use eithercurlorwget, depending on what you have on your computer:1curl -o- https://raw.githubusercontent.com/nvm-sh/nvm/v0.35.3/2install.sh | bash1wget -qO- https://raw.githubusercontent.com/nvm-sh/nvm/v0.35.3/2install.sh | bashYou can also add the source lines manually. Open your shell profile, which is one the following:
~/.bash_profile,~/.zshrc,~/.profile,or~/.bashrc. Since I use zsh shell, I would do:1vim .zshrcThis command opens your shell profile. Then copy and paste the following:
1export NVM_DIR="$HOME/.nvm"2[ -s "$NVM_DIR/nvm.sh" ] && \. "$NVM_DIR/nvm.sh" # This loads nvm3[ -s "$NVM_DIR/bash_completion" ] && \. "\$NVM_DIR/bash_completion"45# This loads nvm bash_completionClose the vim file by pressing:
:+esc+w+q
Reload the shell configuration by using the following command
1source ~/.zshrcVerify the installation
1command -v nvmThis should print
nvmif the installation was successful.Use
nvmto install Node.js. There are several commands you will find handyList all command options by using:
nvm+tab key
Download, compile, and install the latest release of node:
1nvm install nodeHere
nodeis an alias for the latest versionInstall the specific version, for example v12.18.0:
1nvm install v12.18.0Next, you actually have to use that specific version of Node that you just installed:
1nvm use v12.18.0Print the path to the executable file where the specific version was installed:
1nnvm which 12.18.0Change the default Node.js version, let's say from 12.18.0 to 10.20.1:
1nvm alias default 10.16.3Migrate packages from a previous Node.js version:
nvm install node --reinstall-packages-from=node, for example:1nvm install v12.18.0 --reinstall-packages-from=v10.20.1Delete an older version of Node.js:
1nvm uninstall v10.20.1Install and use the LTS version:
1nvm install --lts2nvm use --ltsList all installed Node.js versions available locally on your machine:
1nvm list

Finally, use
nvmto install NPM1nvm install-latest-npmPlease note that this installs the latest working NPM on the node version that you're currently using, such as
~/.nvm/versions/node/[your-version]/lib/node_modules/npm. This is something you want because you want to update the NPM and packages only for that Node.js version which is associated with a specific project and its requirements. Once you have NPM set up, there are several handy commands you can check out:List globally installed packages:
1npm ls -g --depth=0.Update all globally installed packages:
1npm update -gAgain, note that this will update packages inside the path of your active Node.js version instead of the system global path.
Congratulations, you have now successfully installed and understood the ins and outs of Node.js and NPM.
Here is what you have learned:#
You have seen the installation of Node.js via the mac installer
You also have seen the installation of Node.js via
homebrew, arguably the most popular package manager for macOSHowever, the best way to install Node.js is using Node Version Manager. This gives you additional control and flexibility when it comes to customizing different Node.js versions, which might be needed if you are hopping between different projects and their requirements.
I’ve helped you to explore some very basic commands, but please don’t stop here. It’s just the beginning and it’s up to you where this journey will take you!