


Visual Studio 2019 version 16.1 Preview 2 comes with support for Clang/LLVM out-of-the-box. Visual Studio has had great tooling for MSVC and GCC for quite a while now. The latest preview brings Clang into the fold.
Visual Studio 2019 includes out of the box support for editing, building, and debugging CMake projects with Clang/LLVM. If you use MSBuild projects, however, don’t worry. Support for MSBuild based .vcxproj projects is coming soon as well. If you are not familiar with Visual Studio’s CMake, support check out how to get started.
If you are developing on Windows and targeting Clang, we hope to make Visual Studio the best IDE for that job. Please try out the preview and let us know what is working well and what isn’t.
Installing Clang/LLVM for use with Visual Studio
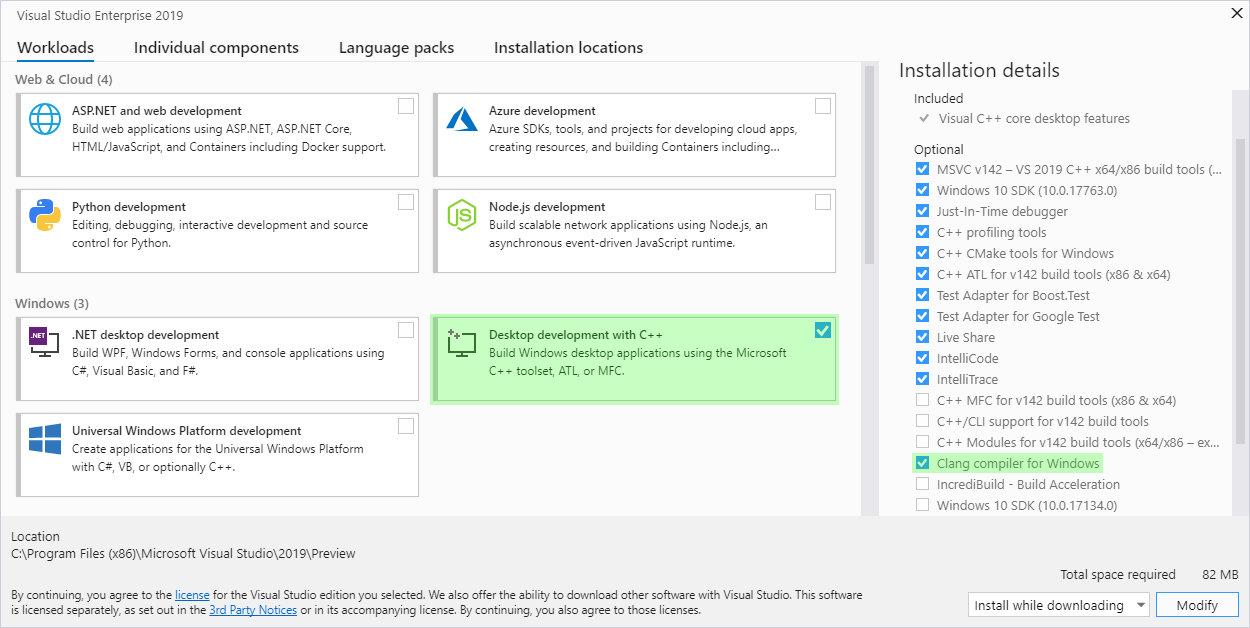
The “Desktop development with C++” workload with the Visual Studio installer now includes full support for targeting Clang/LLVM based toolsets. You will also need the actual compiler and tools to build your projects.
Getting Clang on Windows
On Windows, it’s easy to install the Clang tools. Just grab the “Clang compiler for Windows,” an optional component of the “Desktop development with C++” workload. This will install everything you need to develop with Clang on Windows.
You can also install your own copy of Clang/LLVM or even build it from source. If you have already installed Clang/LLVM you don’t need to install the compiler again with the Visual Studio installer. We do recommend that you use the most recent version of Clang to get the best support in the IDE. Older versions may have some limitations. Check out “Using a Custom Version of Clang” below for more information.
Getting Clang on Linux
To use Clang/LLVM on a remote Linux machine with Visual Studio, just install it with your distribution’s package manager. If ‘which clang’ finds the compiler you are good to go.
Getting Started with Clang/LLVM in Visual Studio
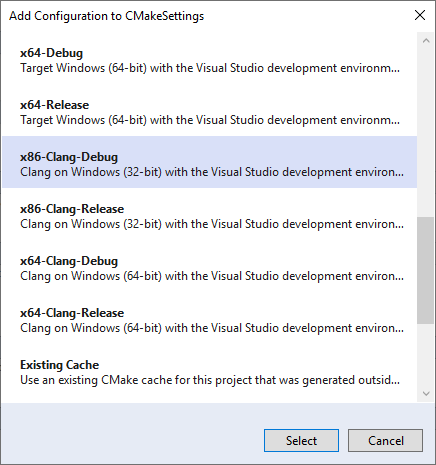
Once you have installed Clang, using it with CMake projects is easy. Visual Studio will use the MSVC compiler by default on Windows. On Linux, it will use the distribution’s default compiler, often GCC. To use Clang instead, add a configuration and select one of the Clang presets.
Select “Manage Configurations” from the configuration drop down on the left of the play button. Then click the “Add Configuration” button:
Another option is to modify an existing configuration with the CMake Settings editor to use any of the “clang” toolsets with the Toolset dropdown: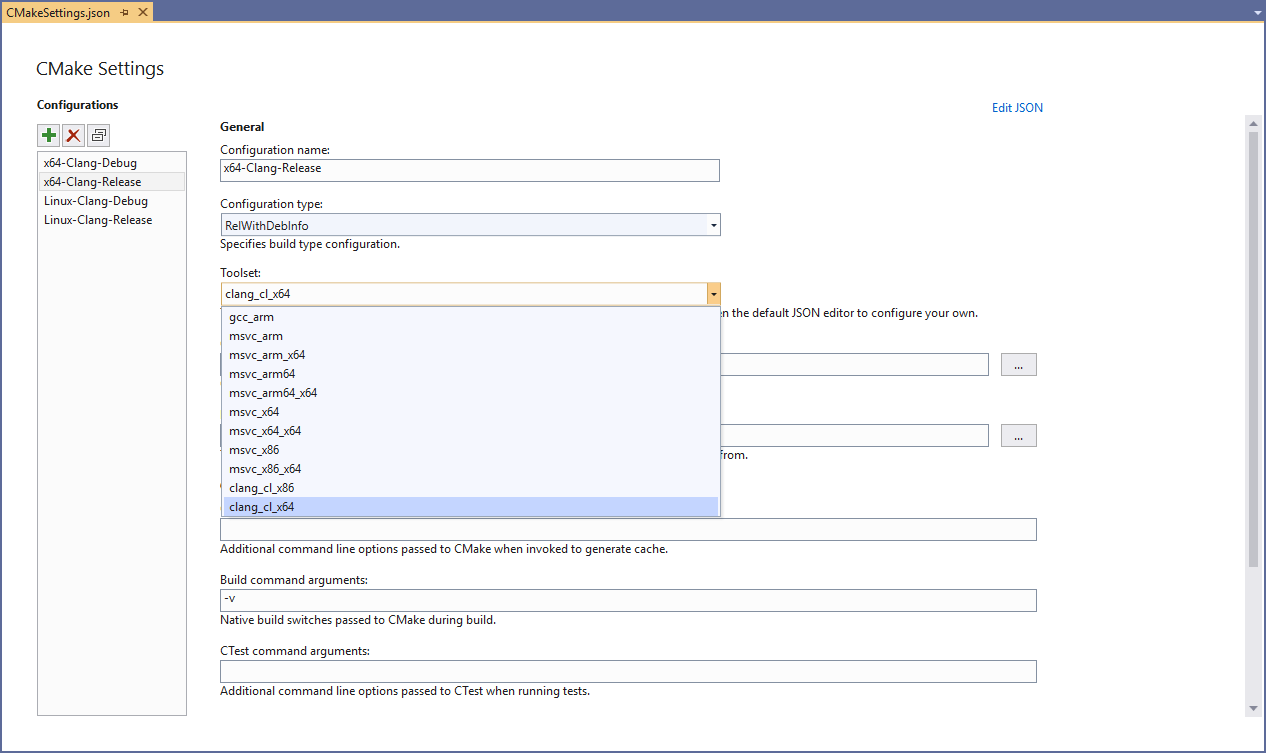
These toolsets will use Clang in clang-cl mode by default on Windows and link with the Microsoft STL. If you are targeting Linux, they will use Clang in GCC compatibility mode. Toolsets to build both 32 and 64-bit binaries are available on Windows while the Linux toolsets will target the architecture of the remote machine. Most of this behavior can be tweaked by customizing either the CMake command line or in the CMake project itself.
Edit, Build, and Debug
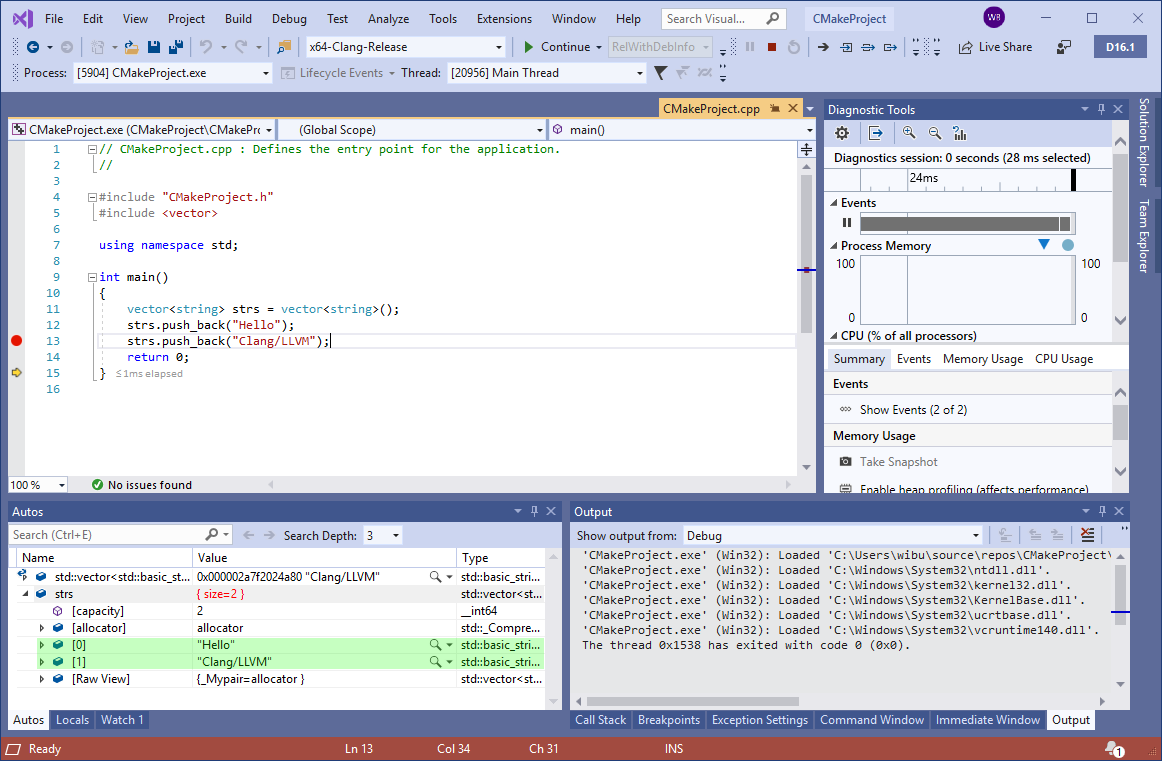
Once you have set up a Clang configuration, build and debug work exactly as you would expect in the IDE. Visual Studio will automatically detect that you are using the Clang compiler and provide applicable IntelliSense, highlighting, navigation, and other editing features. Building projects should just work, provided they are compatible with Clang, with any errors or warnings being directed to the Output Window.
Whether you are targeting Windows or Linux, the debugging experience with Clang should be familiar to you. Most of Visual Studio’s debugging features also work with Clang. There are just a few exceptions for compiler dependent features (e.g. edit and continue.) Breakpoints, memory and data visualization, and other inner development loop debugging features are available:
Using a Custom Installation of Clang
Visual Studio will automatically look for Clang in two places:
- (Windows) The internally installed copy of Clang/LLVM that comes with the Visual Studio installer.
- (Windows and Linux) The PATH environment variable.
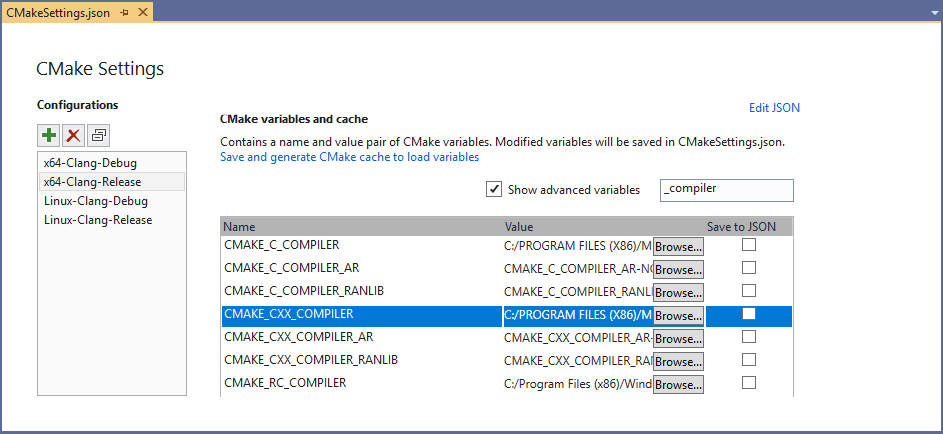
If it doesn’t find Clang in one of those places it will offer to install it on Windows. On Linux, you will need to install it with the distribution’s package manager. Alternatively, you can tell Visual Studio to use another installation of Clang/LLVM on the machine by setting the “CMAKE_C_COMPILER” and “CMAKE_CXX_COMPILER” CMake variables in your CMake Settings:
Keep in mind, however, that using old versions of Clang may come with some limitations. For instance, if you are using the Microsoft STL on Windows, support is only gaurenteed for the most recent version of the compiler. As we release new versions of Visual Studio and the Microsoft STL you may need to upgrade your custom installation.
Using Clang/LLVM with MSBuild Projects
Visual Studio 2019 version 16.1 ships with out of the box support for Clang/LLVM for CMake projects. Support for MSBuild based C++ projects is on the roadmap and will be available soon in a future release. To use Clang/LLVM today with MSBuild based C++ projects there are 3rd party extensions for Visual Studio available.
Send Us Feedback
Please try out the latest preview and let us know if you have any feedback. It is always appreciated! The best way to get in touch with us about an issue or suggestion is though Developer Community with the “Report a Problem” or “Suggest a Feature” tools. This makes it easy for us to follow up and for you to get the latest updates about our progress. Feel free to comment here or send an email to cmake@microsoft.com with questions as well.